すべてを忘れて、無我夢中で、書きました!
自分史上、最高速のマークシートリーダーです。
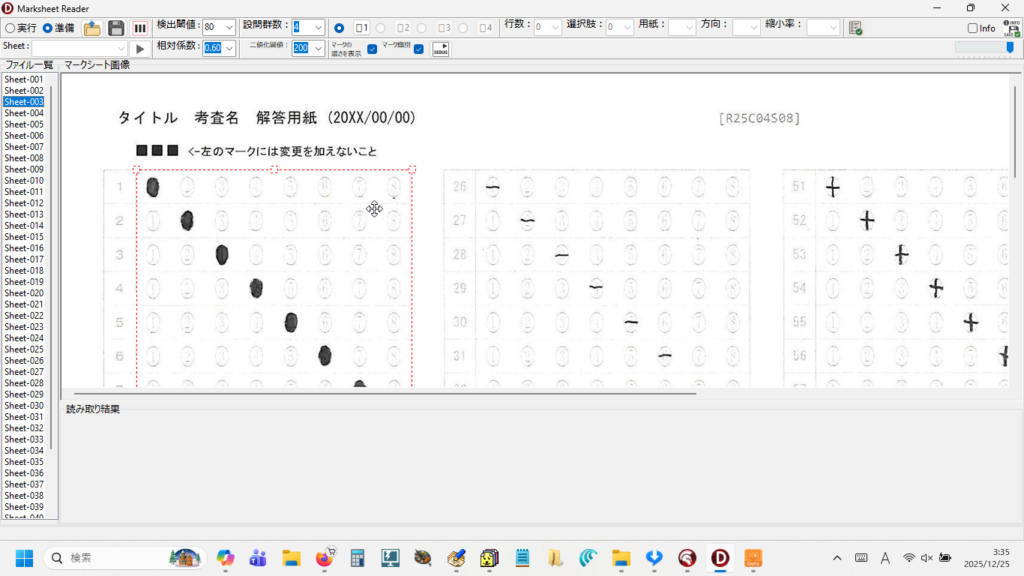
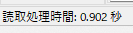
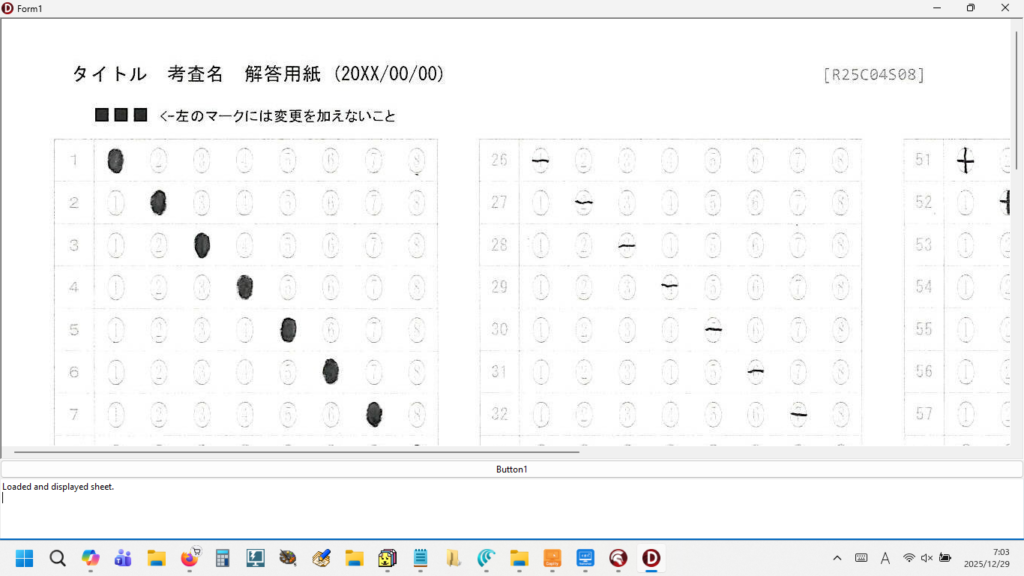
100 設問8選択肢のマークシート 42 枚を、My PC では、最短 0.902 秒で読みます。

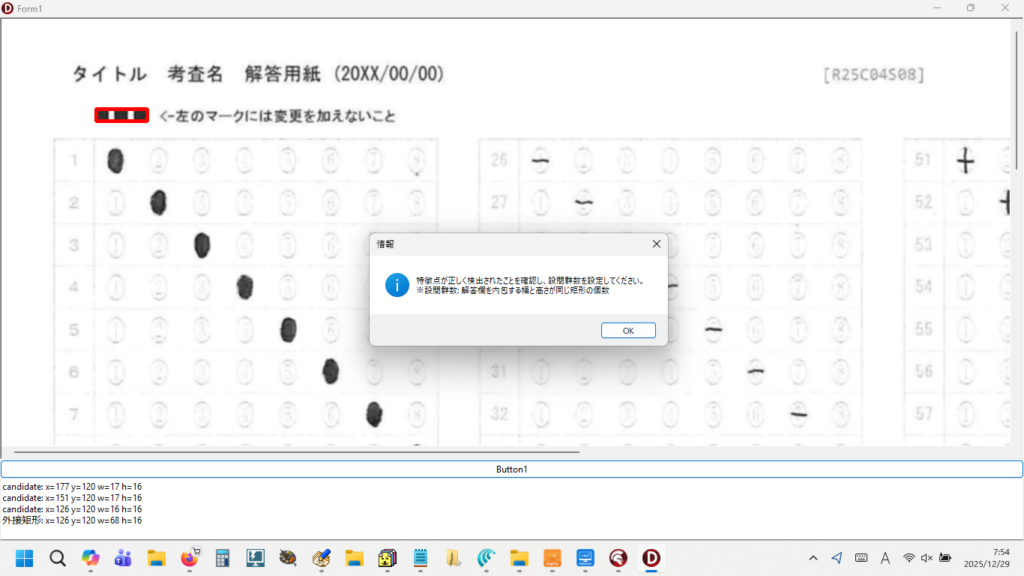
↑ この画面左下部分を拡大
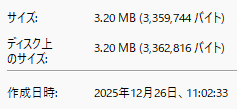
しかも、このサイズ! フロッピーディスク2枚に収ま・・・らないか。3枚なら余裕。
(収めたくても、フロッピー。もぉ、ないけど!)
このプログラムは、まだ実際の採点現場で動作検証しておりませんので公開できませんが、このプログラムで利用した Secret Weapon 的存在が Delphi 用の OpenCV です。
・・・ ということで、今回は「マークシートリーダー的なプログラムを作るために必要な、最小構成の OpenCV 」についてのお話です。
【もくじ】
1.そもそも OpenCV とは?
2.最小構成のOpenCVで画像を表示
3.最小構成のOpenCVで輪郭検出
4.まとめ
5.お願いとお断り
1.そもそも OpenCV とは?
正式名称は Open Source Computer Vision Library。よく説明に使われるのは「ソースコードが公開されている画像処理ライブラリ」、つまり、誰でも自由に見たり、使ったり、改良したりできる仕組みを持った、みんなで育てるソフトウェアということでしょうか。
自分的には『 コンピュータの眼 』だと、思っとります。
Python を学ぶ課程で、OpenCV を利用すると様々な画像処理が手軽に実装できることを知りました。例えばマークシートの解答欄を検出するための基準となる特徴点の検出や、解答欄矩形の座標の取得等、OpenCV のライブラリを使えば「夢みたいなこと」が「走召!」簡単とは言えませんが、僕でも勉強すれば、Python を介して何とか実装できることを知ったのです!
知ったのですが・・・
ただ、僕には、それを直接 Delphi から、使うことはできませんでした・・・
それを導入しようとしても・・・、エラーが、いっぱい、出て。
だから、今、思えば、ものすごく遠回りをして、OpenCV の機能を使ってきました。Python4Delphi や Embeddable Python には、感謝しても、感謝しきれませんが・・・。
今回、生成 AI から様々なヒントをもらい、ようやく My PC で最小構成の OpenCV を使って画像処理を実行することに成功しました!
出来てしまえば、それは、あっけないくらい、カンタンなことでしたが。
もしかしたら・・・、ほんとうに、もしかしたら、ですが、僕と同じように、画像の表示・輪郭検出等が可能な最小構成の OpenCV の実装方法について悩んでいらっしゃる方がいるかもしれないと思い、(自分的には私的究極の目的であるマークシートリーダーを作成するために必要な・・・という但し書き付きですが)、僕的に必要とする最小構成の OpenCV について、ごく浅い、拙い経験を元に、記事としてここに残すことにした次第です。
2.最小構成のOpenCVで画像を表示
ナニはともあれ、OpenCV がなくては何にも始まりませんので、まず、最初にコレを入手します。
ただし、イロイロと問題がありまして、私の場合、最新版ではないモノが欲しいのです。なぜなら、作りたいプログラムは 32 ビット版だから。となると、現在入手可能な 32 ビット版の OpenCV はこれ一択のようです。(間違っていたらごめんなさい)
https://github.com/Laex/Delphi-OpenCV
それからDelphi 環境で OpenCV を実行するためには OpenCV の DLL が必要なので、SourceForge から OpenCV 2.4.13.6 をダウンロード。こっちは『OpenCV 2.4.13.6』で検索してヒットする SourceForge の Download opencv-2.4.13.6-vc14.exe (OpenCV) リンクをクリックしたら Windows 用バイナリが勝手にダウンロードされたので、これを展開。
展開先の opencv-2.4.13.6-vc14\opencv\build\x86\vc14\bin に DLL があるので、必要な DLL を Delphi で作成する exe があるフォルダにあとからコピーします。
あと、OpenCV 2.4.13.6 の Windowsビルドは Visual C++ 2015 (VC14) でコンパイルされているそうなので、msvcp140.dll や vcruntime140.dll が必要。
https://my.visualstudio.com/Downloads/Featured?mkt=ja-jp
上のリンク先『ダウンロードとプロダクト キー』へ行き、表示される画面の左側の『Developer Tools』に『Visual Studio 2022』(リンク)をクリック。
表示されたページの中ほどに「Visual C++ Redistributable for Visual Studio 2022」があるので、その右側の ComboBox みたいな部分で x64 を x86 に変更して『ダウンロード』ボタンをクリック。
「Visual C++ Redistributable for Visual Studio 2022」は「VC_redist.x86.exe」で保存されました。これをインストールすると、2015 以降のランタイム(2015, 2017, 2019, 2022)は統合されているため、「Visual C++ 2015 Redistributable」も含まれてインストールされるようです。
実際のインストール作業では、VC_redist.x86.exe をダウンロードから任意のフォルダにコピペして、ダブルクリックして実行(実行時、インストール画面はタスクバー内に出現するので注意!)→ インストール完了後、システムの再起動が必要でした。
再起動後、PowerShell(x86) を起動して確認。x86 版のインストールを確認するには、PowerShell も x86 版でないといけません。x64 版で確認しようとして『パスが存在しないため検出できません』と赤文字で表示され、慌てふためいた経験を持つ人がここに約1名。ぎゃはは。
PowerShell(x86)で次のコマンドを入力してインストール結果を確認します。
PS C:\Users\xxx> Get-ItemProperty "HKLM:\SOFTWARE\Microsoft\VisualStudio\14.0\VC\Runtimes\x86"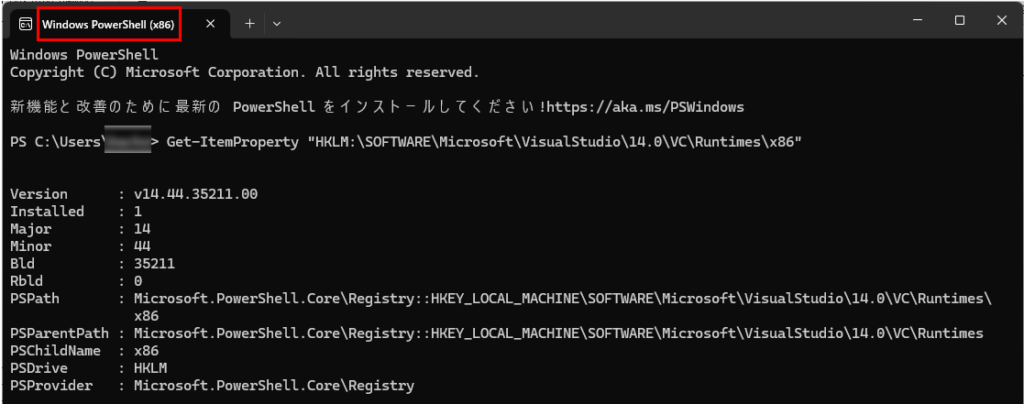
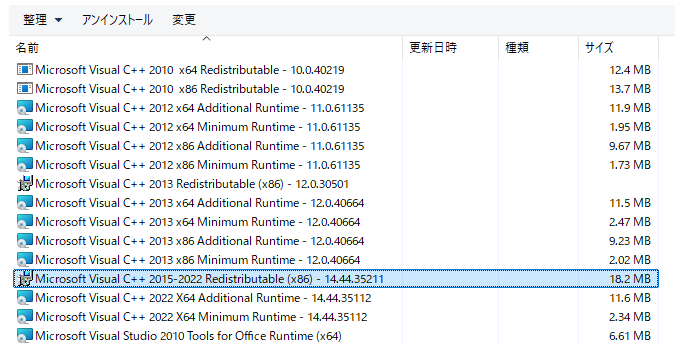
また、コントロールパネルの「プログラムと機能」を開いて存在を確認。
DLL の存在も確認。PowerShell で次のコマンドを入力して True が返ることを確認します。
Test-Path "C:\Windows\SysWOW64\msvcp140.dll"
Test-Path "C:\Windows\SysWOW64\vcruntime140.dll"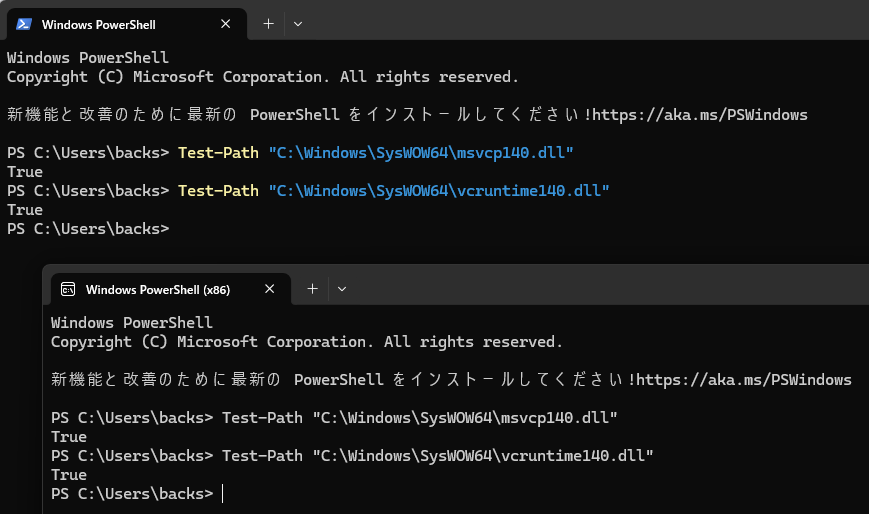
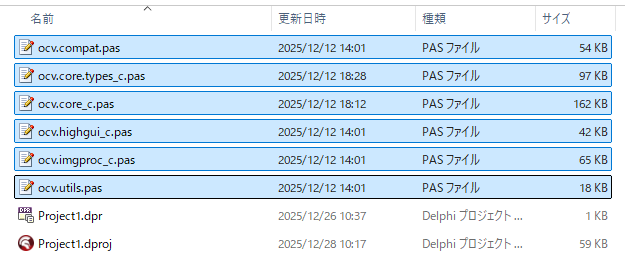
で、先にダウンロードしていた Delphi-OpenCV-master.zip も任意の場所に展開して、source フォルダの中にある拡張子が .pas のファイルから次のファイルのみ、Delphi のプロジェクトファイル(.dproj)があるフォルダへコピーします。
ちなみに各ファイルの役割分担は・・・
型定義 → ocv.compat.pas
画像構造体(IplImage) → ocv.core.types_c.pas
コア処理 → ocv.core_c.pas
画像読み込み / 保存 → ocv.highgui_c.pas
画像処理(ぼかし・二値化・輪郭など) → ocv.imgproc_c.pas
ユーティリティ → ocv.utils.pas
これだけで次の機能はすべて使えました!
・画像読み込み(cvLoadImage)
・グレースケール化
・ぼかし
・二値化
・輪郭抽出(マーク位置判定の要)
・画像の部分切り出し
「opencv-2.4.13.6-vc14\opencv\build\x86\vc14\bin に DLL がある」と先に言いましたが、次の DLL を exe と同じ場所へコピーします(先に Form だけ作っておいて、1回、実行して exe を作成しておく必要があります)。

将来、作成したプログラムを公開(配布)する予定がある場合は、OpenCV 本体の LICENSE ファイルをここでダウンロードして exe と同じ場所に DLL と一緒に置いておくのがよいと思います。OpenCV を配布する際は、Delphi‑OpenCV の LICENSE( MPL-1.1.txt )に加えて、OpenCV 本体の LICENSE ファイルも同梱して配布する必要があるからです。忘れないように必ずやっておきましょう。
ちなみに、OpenCV 本体の LICENSE ファイルは、ダウンロードする必要があるようです。次の場所から入手できました。
https://github.com/opencv/opencv/blob/2.4/LICENSE
これでプログラミングする準備ができました!
OpenCV で画像を表示するコードを書いて、本当に OpenCV が使えるか? 確認です。
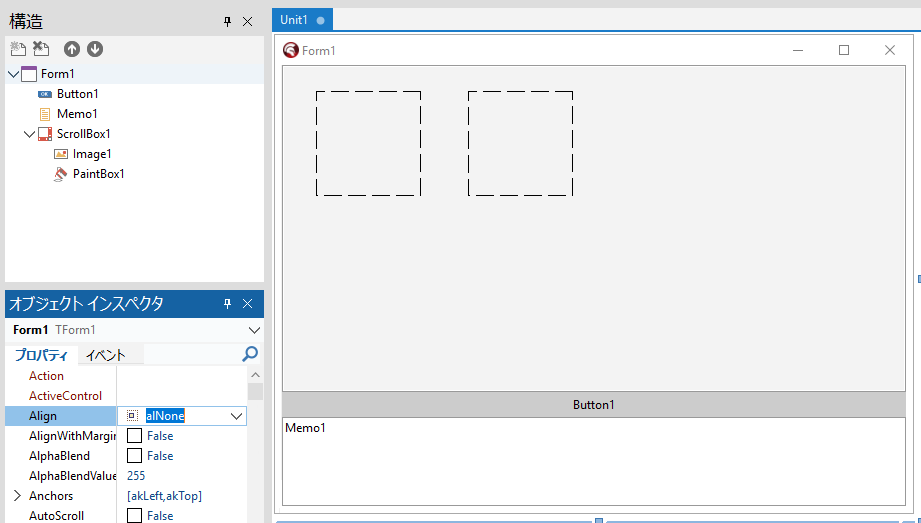
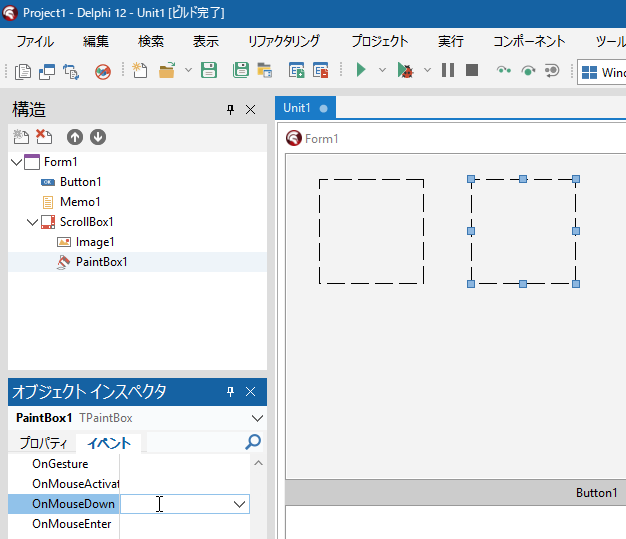
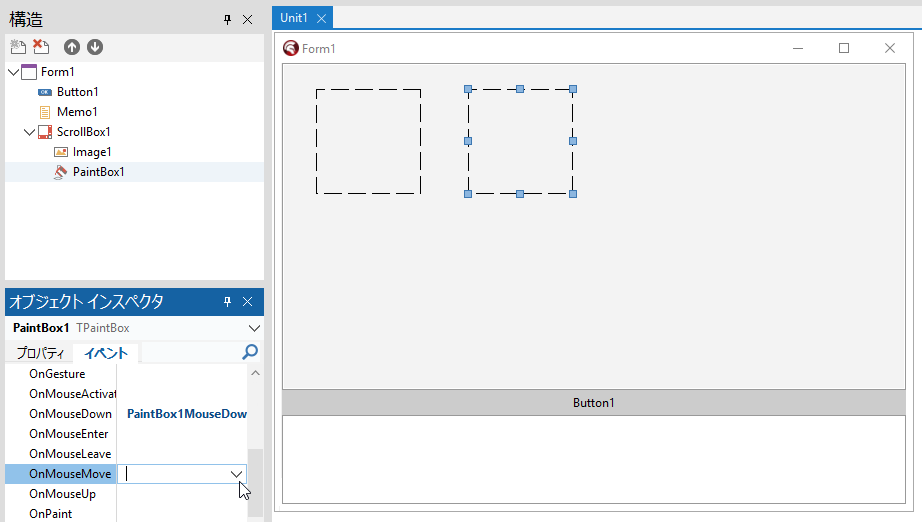
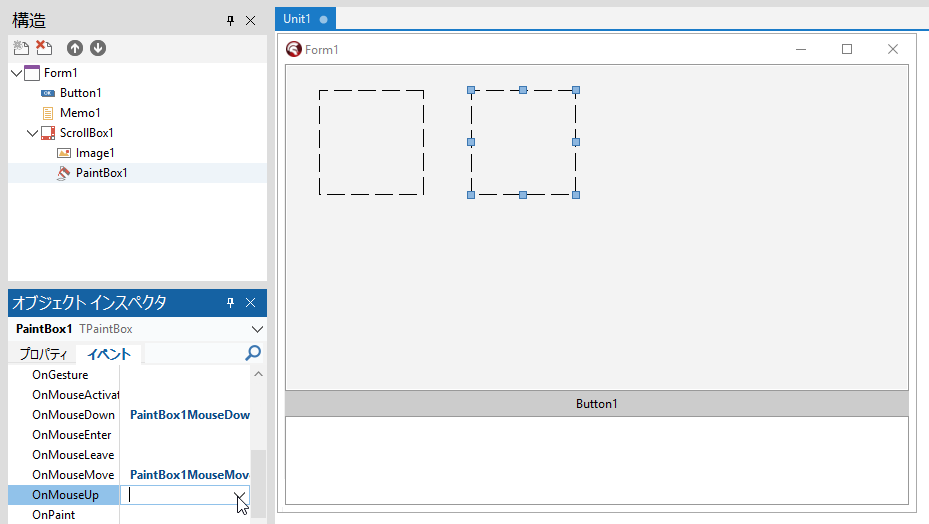
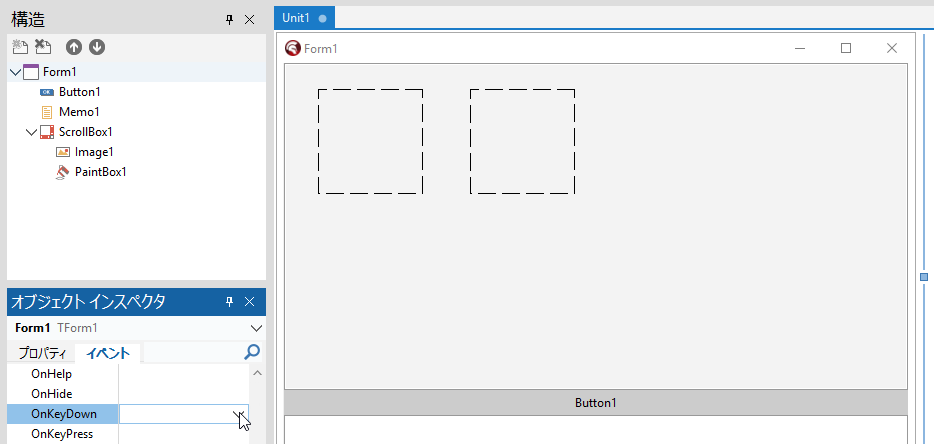
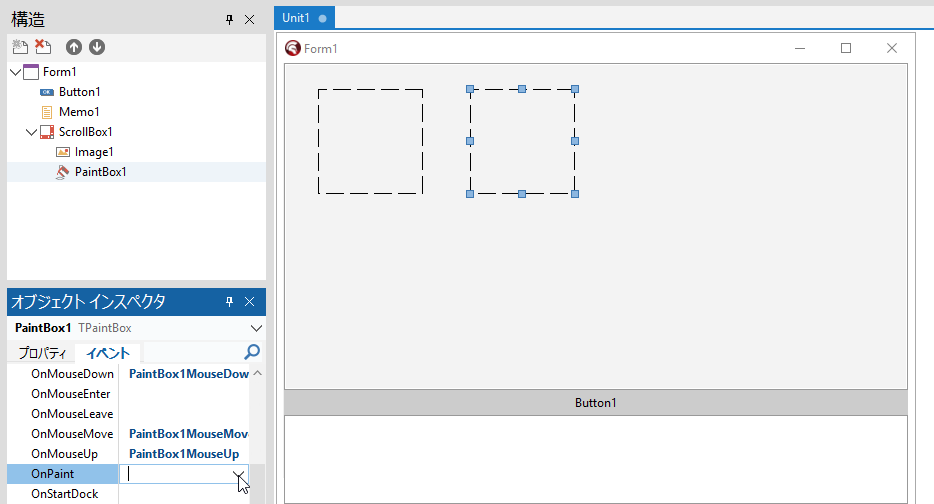
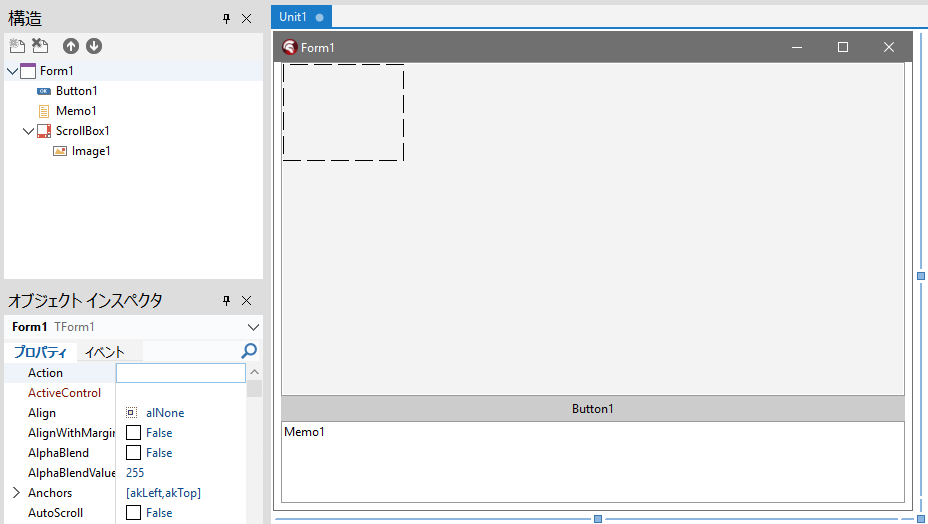
Form1 の上に Memo1 と Button1 と ScrollBox1(親)と Image1(子 )を置いて、Memo1 の Align を alBottom に設定し、続けて Button1 も Align を alBottom に設定しておいて、ScrollBox1 の Align を alClient に設定します。Form1 は、最大化状態で表示されるよう、オブジェクトインスペクタで WindowState プロパティを wsMaximized にしておきます。
exe と同じ場所にマークシートの画像( sheet.jpg )を用意して、次のコードを書きます。
あと Memo1 の Lines は Memo1 を消して空にしておきます。
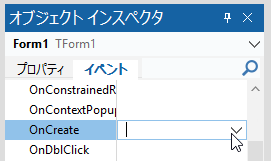
procedure TForm1.FormShow(Sender: TObject);
var
  img: pIplImage;
begin
  img := cvLoadImage(
    PAnsiChar(AnsiString(ExtractFilePath(Application.ExeName) + 'sheet.jpg')),
    CV_LOAD_IMAGE_COLOR);
  if Assigned(img) then
  begin
    frameBitmap := TBitmap.Create;
    frameBitmap.PixelFormat := pf24bit;
    frameBitmap.HandleType := bmDIB;

    IplImage2Bitmap(img, frameBitmap);

    //Image1 のサイズを画像に合わせて変更
    Image1.Picture.Assign(nil);
    Image1.Width  := frameBitmap.Width;
    Image1.Height := frameBitmap.Height;

    //表示
    Image1.Picture.Bitmap.Assign(frameBitmap);

    Memo1.Lines.Add('Loaded and displayed sheet.');
    cvReleaseImage(img);
  end else
    Memo1.Lines.Add('Failed!');
end;
実行してみました!
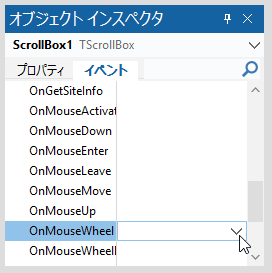
ちなみに、マウスのホイールで画像をスクロールさせるなら、ScrollBox1 の OnMouseWheel 手続きを作成して、次のコードを記述します。
procedure TForm1.ScrollBox1MouseWheel(Sender: TObject; Shift: TShiftState;
  WheelDelta: Integer; MousePos: TPoint; var Handled: Boolean);
const
  ScrollStep = 40; //ホイール1回の移動量
begin
  if ssShift in Shift then
  begin
    //横スクロール(Shift + ホイール)
    ScrollBox1.HorzScrollBar.Position :=
      ScrollBox1.HorzScrollBar.Position - (WheelDelta div 120) * ScrollStep;
  end
  else
  begin
    //縦スクロール(通常)
    ScrollBox1.VertScrollBar.Position :=
      ScrollBox1.VertScrollBar.Position - (WheelDelta div 120) * ScrollStep;
  end;
  //処理済み
  Handled := True;
end;
ながーい間、夢だった OpenCV で( Python の力も借りずに)画像が表示できました!
自分には無理だとあきらめていた時期もありましたので、まさに感無量ですが、まだ確認しなければならないことがあります。
それは『輪郭検出』。
マークシートリーダーを作成するために OpenCV が必要な理由のすべてがここにあります。
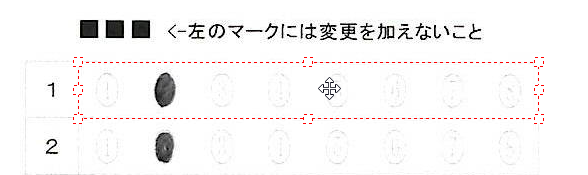
私が過去に作ったマークシートリーダーでは、マークシートの左上に印刷されたトリプル・ドット。この ■■■ の左上の座標を起点として各設問群矩形までの距離を計測(左上・右下の座標を取得すれば矩形の幅と高さが計算できる)し、各設問群のブロックを切り出して、それを行、そして列に分割、ひとつひとつのマークを切り出して塗り面積の大きなものを「マークあり」と判定しています。
マークシートは印刷物ですから、1枚1枚ごとにどうしても微妙な印刷位置のズレが発生するのは避けられません(現在のプリンタは優秀でほとんどズレませんが)。また、マークシートをスキャナーでスキャンした際にも、1枚ごとに異なる微妙なズレや傾きが発生します。しかし、■■■ と各設問群矩形の距離は紙が濡れて乾いた後ならともかく、通常の状態では絶対に変化しません。ですので、最初に ■■■ の位置を検出して、そこからの距離を用いてマークシートを切り出せば、印刷位置のズレに強い、すなわち、マーク切り出し位置が「ブレない」プログラムが作れます。
ですので、この『輪郭検出』が安定して成功するか・どうががマークシートリーダーそのものの成否のカギを握っています。
『輪郭検出』 はたして、それが出来るか、どうか?
3.最小構成のOpenCVで輪郭検出
Button1 のクリックイベント(手続き)に、次のコードを書きます。
procedure TForm1.Button1Click(Sender: TObject);
const
{$IFNDEF CV_GAUSSIAN}
CV_GAUSSIAN = 2;
{$ENDIF}
{$IFNDEF CV_GRAY2BGR}
CV_GRAY2BGR = 8;
{$ENDIF}
{$IFNDEF CV_THRESH_BINARY_INV}
CV_THRESH_BINARY_INV = 1;
{$ENDIF}
type
TRectInfo = record
x, y, w, h: Integer;
end;
var
src, gray, bin: pIplImage;
colorImg: pIplImage;
contours, c: pCvSeq;
storage: pCvMemStorage;
rect: TCvRect;
bmp: TBitmap;
y, i, j, k, l: Integer;
Lcandidates: array of TRectInfo;
ti: TRectInfo;
found: Boolean;
bestIdx: Integer;
dx1, dx2: Integer;
minX, minY, maxX, maxY: Integer;
strMsg: string;
LeftX, TopY: Integer;
intX, intY: Integer;
rowHeight, colWidth: Double;
x1, x2, y1, y2: Integer;
R: TRect;
roi: pIplImage;
meanVal: TCvScalar;
intRowNum, intSelNum: integer;
GridRow: Integer;
area: Integer;
marks: TStringList;
roiArea: Integer;
whiteRatio: Double;
ratios: array of Double;
maxRatio: Double;
BNum, ENum: Integer;
localRow: Integer;
orig: pIplImage;
bmpOrig: TBitmap;
function SafeSetROI(img: pIplImage; x1,y1,x2,y2: Integer): Boolean;
begin
Result := False;
if img = nil then Exit;
if (x1 < 0) or (y1 < 0) then Exit;
if (x2 > img^.width) or (y2 > img^.height) then Exit;
if (x2 <= x1) or (y2 <= y1) then Exit;
cvSetImageROI(img, cvRect(x1,y1,x2-x1,y2-y1));
Result := True;
end;
begin
Memo1.Clear;
src := cvLoadImage(PAnsiChar(AnsiString('sheet.jpg')), CV_LOAD_IMAGE_GRAYSCALE);
if src = nil then
begin
Memo1.Lines.Add('マークシート画像が読み込めません');
raise Exception.Create('画像読み込み失敗');
end;
gray := cvCloneImage(src);
cvSmooth(src, gray, CV_GAUSSIAN, 5, 5);
bin := cvCreateImage(cvSize(gray^.width, gray^.height), IPL_DEPTH_8U, 1);
cvThreshold(gray, bin, 80, 255, CV_THRESH_BINARY_INV);
storage := cvCreateMemStorage(0);
contours := nil;
cvFindContours(bin, storage, @contours,
SizeOf(TCvContour),
CV_RETR_EXTERNAL, CV_CHAIN_APPROX_SIMPLE,
cvPoint(0,0));
colorImg := cvCreateImage(cvSize(gray^.width, gray^.height), IPL_DEPTH_8U, 3);
cvCvtColor(gray, colorImg, CV_GRAY2BGR);
SetLength(Lcandidates, 0);
c := contours;
while c <> nil do
begin
rect := cvBoundingRect(c, 0);
if (rect.x < 400) and (rect.y < 250) and
(rect.width >= 10) and (rect.width <= 30) and
(rect.height >= 10) and (rect.height <= 30) and
(Abs(rect.width - rect.height) <= 6) then
begin
ti.x := rect.x;
ti.y := rect.y;
ti.w := rect.width;
ti.h := rect.height;
i := Length(Lcandidates);
SetLength(Lcandidates, i + 1);
Lcandidates[i] := ti;
Memo1.Lines.Add(Format('candidate: x=%d y=%d w=%d h=%d', [ti.x, ti.y, ti.w, ti.h]));
end;
c := c^.h_next;
end;
if Length(Lcandidates) < 3 then
begin
Memo1.Lines.Add('候補が3未満のため、条件を緩めて再収集します');
SetLength(Lcandidates, 0);
c := contours;
while c <> nil do
begin
rect := cvBoundingRect(c, 0);
if (rect.x < 500) and (rect.y < 400) and
(rect.width >= 6) and (rect.width <= 60) and
(rect.height >= 6) and (rect.height <= 60) and
(Abs(rect.width - rect.height) <= 12) then
begin
ti.x := rect.x; ti.y := rect.y; ti.w := rect.width; ti.h := rect.height;
i := Length(Lcandidates); SetLength(Lcandidates, i + 1); Lcandidates[i] := ti;
Memo1.Lines.Add(Format('relaxed candidate: x=%d y=%d w=%d h=%d', [ti.x, ti.y, ti.w, ti.h]));
end;
c := c^.h_next;
end;
end;
if Length(Lcandidates) < 3 then
begin
strMsg:='特徴点が見つかりませんでした'+ sLineBreak +'処理を中止します。';
Application.MessageBox(PChar(strMsg), PChar('エラー'), MB_ICONERROR);
bmp := TBitmap.Create;
try
bmp.PixelFormat := pf24bit;
bmp.Width := colorImg^.width;
bmp.Height := colorImg^.height;
for y := 0 to bmp.Height - 1 do
Move((colorImg^.imageData + y * colorImg^.widthStep)^, bmp.ScanLine[y]^, colorImg^.width * 3);
DrawBitmapKeepAspect(Image1, bmp);
finally
bmp.Free;
end;
cvReleaseImage(colorImg);
cvReleaseImage(bin);
cvReleaseImage(gray);
cvReleaseImage(src);
cvReleaseMemStorage(storage);
Exit;
end;
for i := 0 to Length(Lcandidates) - 2 do
for j := i + 1 to Length(Lcandidates) - 1 do
if Lcandidates[i].x > Lcandidates[j].x then
begin
ti := Lcandidates[i];
Lcandidates[i] := Lcandidates[j];
Lcandidates[j] := ti;
end;
found := False;
bestIdx := -1;
for i := 0 to Length(Lcandidates) - 3 do
begin
if (Abs(Lcandidates[i].y - Lcandidates[i+1].y) <= 8) and (Abs(Lcandidates[i].y - Lcandidates[i+2].y) <= 8) then
begin
dx1 := Lcandidates[i+1].x - Lcandidates[i].x;
dx2 := Lcandidates[i+2].x - Lcandidates[i+1].x;
if (dx1 >= 10) and (dx1 <= 60) and (dx2 >= 10) and (dx2 <= 60) and (Abs(dx1 - dx2) <= 12) then
begin
found := True;
bestIdx := i;
Break;
end;
end;
end;
if not found then
begin
strMsg:='特徴点が見つかりませんでした(詳細候補数=' + IntToStr(Length(Lcandidates)) + ')'+ sLineBreak +'処理を中止します。';
Application.MessageBox(PChar(strMsg), PChar('エラー'), MB_ICONERROR);
bmp := TBitmap.Create;
try
bmp.PixelFormat := pf24bit;
bmp.Width := colorImg^.width;
bmp.Height := colorImg^.height;
for y := 0 to bmp.Height - 1 do
Move((colorImg^.imageData + y * colorImg^.widthStep)^, bmp.ScanLine[y]^, colorImg^.width * 3);
DrawBitmapKeepAspect(Image1, bmp);
finally
bmp.Free;
end;
// cleanup
if colorImg <> nil then cvReleaseImage(colorImg);
if bin <> nil then cvReleaseImage(bin);
if gray <> nil then cvReleaseImage(gray);
if src <> nil then cvReleaseImage(src);
if storage <> nil then cvReleaseMemStorage(storage);
Exit;
end;
minX := Lcandidates[bestIdx].x;
minY := Lcandidates[bestIdx].y;
maxX := Lcandidates[bestIdx].x + Lcandidates[bestIdx].w;
maxY := Lcandidates[bestIdx].y + Lcandidates[bestIdx].h;
for i := 1 to 2 do
begin
if Lcandidates[bestIdx + i].x < minX then
minX := Lcandidates[bestIdx + i].x;
if Lcandidates[bestIdx + i].y < minY then
minY := Lcandidates[bestIdx + i].y;
if (Lcandidates[bestIdx + i].x + Lcandidates[bestIdx + i].w) > maxX then
maxX := Lcandidates[bestIdx + i].x + Lcandidates[bestIdx + i].w;
if (Lcandidates[bestIdx + i].y + Lcandidates[bestIdx + i].h) > maxY then
maxY := Lcandidates[bestIdx + i].y + Lcandidates[bestIdx + i].h;
end;
cvRectangle(
colorImg,
cvPoint(minX, minY),
cvPoint(maxX, maxY),
CV_RGB(255, 0, 0),
3);
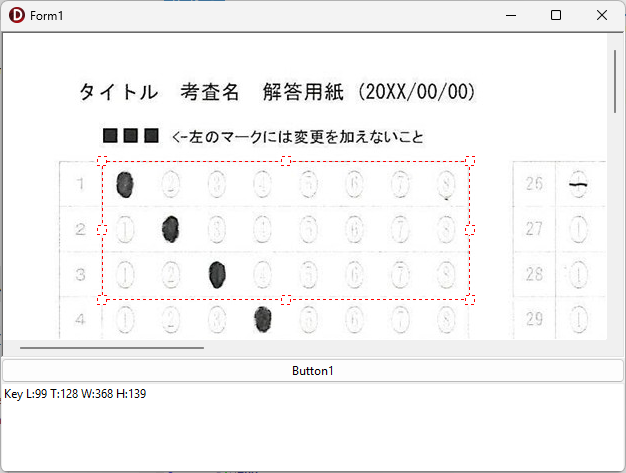
Memo1.Lines.Add(Format(
'外接矩形: x=%d y=%d w=%d h=%d',
[minX, minY, maxX - minX, maxY - minY]
));
bmp := TBitmap.Create;
try
bmp.PixelFormat := pf24bit;
bmp.Width := colorImg^.width;
bmp.Height := colorImg^.height;
for y := 0 to bmp.Height - 1 do
Move((colorImg^.imageData + y * colorImg^.widthStep)^, bmp.ScanLine[y]^, colorImg^.width * 3);
ScrollBox1.HorzScrollBar.Position := 0;
ScrollBox1.VertScrollBar.Position := 0;
Image1.Align := AlNone;
Image1.Picture.Graphic := nil;
Image1.Stretch := False;
Image1.Left := 0;
Image1.Top := 0;
SetStretchBltMode(Image1.Canvas.Handle, HALFTONE);
Image1.Picture.Bitmap := bmp;
finally
bmp.Free;
end;
//特徴点検出成功時の追加処理
//if chkInfo.Checked then //直後にぼかしのない画像を表示しているので、案内は必ず必要!
//begin
strMsg := '特徴点が正しく検出されたことを確認し、設問群数を設定してください。'+#13#10+
'※設問群数: 解答欄を内包する幅と高さが同じ矩形の個数';
Application.MessageBox(PChar(strMsg), PChar('情報'), MB_ICONINFORMATION);
//end;
//元画像(ぼかしなし)を再読み込みして表示
orig := cvLoadImage(
PAnsiChar(AnsiString('sheet.jpg')),
CV_LOAD_IMAGE_COLOR
);
if orig <> nil then
begin
bmpOrig := TBitmap.Create;
try
bmpOrig.PixelFormat := pf24bit;
bmpOrig.Width := orig^.width;
bmpOrig.Height := orig^.height;
for y := 0 to bmpOrig.Height - 1 do
Move(
(orig^.imageData + y * orig^.widthStep)^,
bmpOrig.ScanLine[y]^,
orig^.width * 3
);
//初期化
ScrollBox1.HorzScrollBar.Position := 0;
ScrollBox1.VertScrollBar.Position := 0;
Image1.Align := alNone;
Image1.Picture.Graphic := nil;
Image1.Stretch := False;
Image1.Left := 0;
Image1.Top := 0;
Image1.Picture.Bitmap := bmpOrig;
finally
bmpOrig.Free;
cvReleaseImage(orig);
end;
end;
// cleanup
if colorImg <> nil then cvReleaseImage(colorImg);
if bin <> nil then cvReleaseImage(bin);
if gray <> nil then cvReleaseImage(gray);
if src <> nil then cvReleaseImage(src);
if storage <> nil then cvReleaseMemStorage(storage);
end;祈るような気持ちで、実行!
これさえ出来れば、この勝負、
もう勝ったようなものです。
あとは・・・
日に夜を次いでプログラミングに没頭し、
自分史上最高のマークシートリーダーを完成させるだけです!
4.まとめ
(1)32 bit 環境で使える OpenCV は opencv-2.4.13.6-vc14 がある。
(2)動作には Visual C++ Redistributable for Visual Studio 2022 のインストールも必要だった。
(3)必要最小限の .pas と OpenCV の DLL を用意すればマークシートリーダーは作成可能。
5.お願いとお断り
このサイトの内容を利用される場合は、自己責任でお願いします。記載した内容(プログラムを含む)を利用した結果、利用者および第三者に損害が発生したとしても、このサイトの管理者は一切責任を負えません。予め、ご了承ください。